There is a coil of rope on the bed, and a decision attached to it. Picking it up is easy. Knowing what to do next, and what to stop doing, is where most people stall.
This is a working guide to rope bondage, written for someone who has never tied another person. It covers how to choose rope, how to negotiate consent before the first knot, how to tie a first cuff and a simple harness, how to run a hand check while someone is tied, and how to handle a problem without panicking. Rope bondage for beginners, in the literal sense: the physical detail an adult needs, with no condescension and no shame.
It is for readers with a partner, readers without one, and readers with more than one. Any mix of genders. Dominance and submission optional. None of that changes the safety information, because nerve compression does not care who is holding the rope.
The risk in rope is real, specific, and learnable. That last word is the reason for everything that follows.
What Is Rope Bondage? Shibari, Restraint, and What to Expect
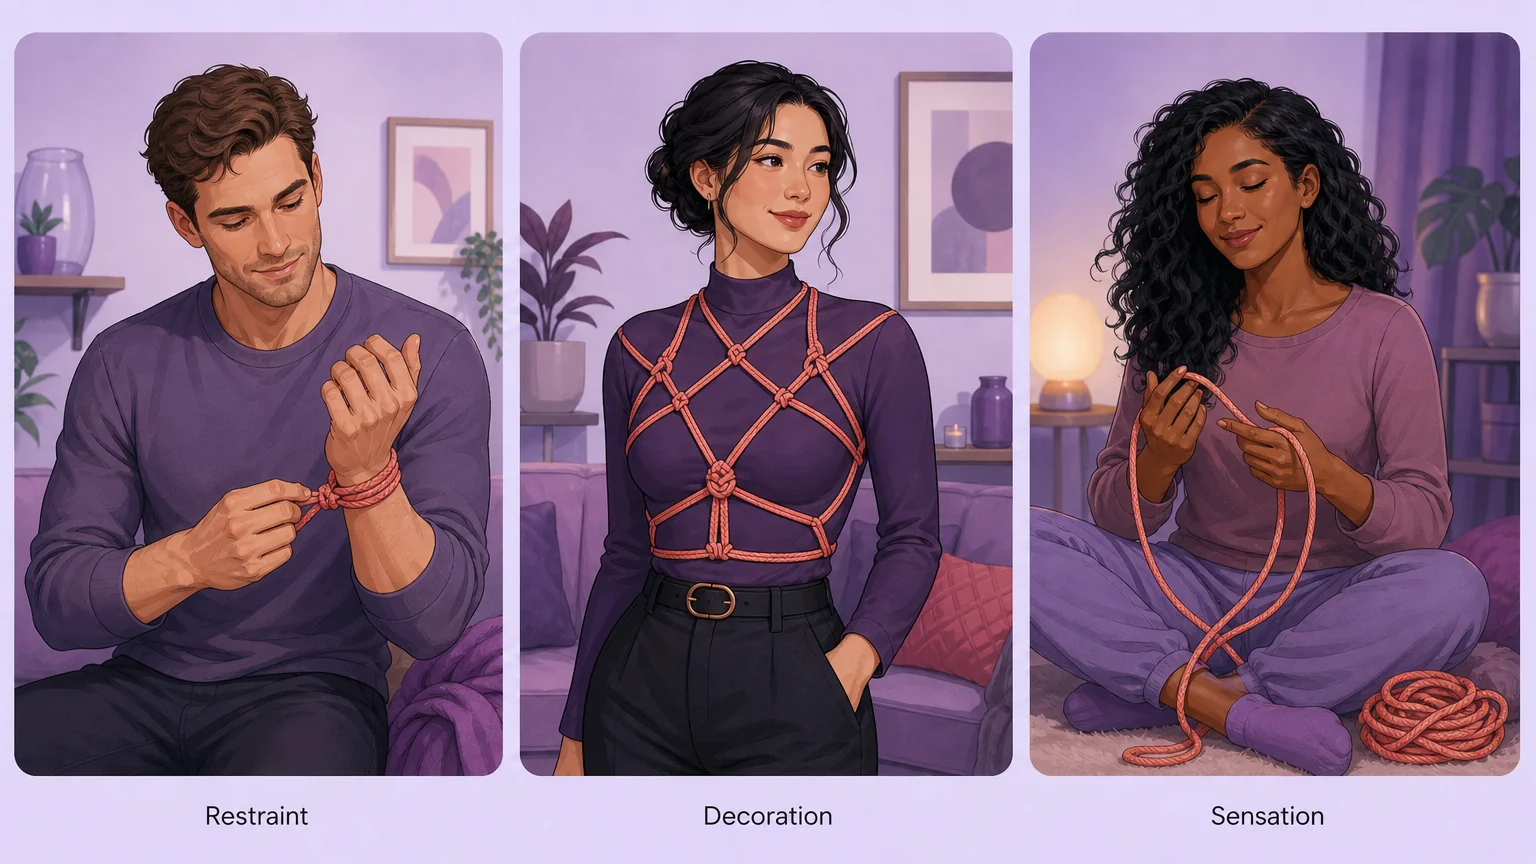
Rope bondage is one type of bondage, using rope to restrain, decorate, or create sensation on a body. That ranges from a loose cuff on one wrist to a full-body pattern that takes an hour to build. It can be sexual, meditative, aesthetic, or all three at once, and none of those is required.
The roles are roles, not genders. Topping, bottoming, and switching describe who ties, who is tied, and who does both. Rope does not require a partner or a power exchange.
Plenty of people tie for the look of it, for the pressure, or for the quiet. Others want the restraint and nothing else.
Rope differs from other restraint gear. Cuffs, straps, and furniture hold a body in place with hardware. Patterned rope work uses tension, friction, and the shape of the body itself.
Shibari and kinbaku are the Japanese terms most people mean when they talk about the patterned, aesthetic style. That is as far as the vocabulary needs to go. The words are useful for finding instruction, not for deciding whether you belong.
Rope is not a performance, a test of toughness, a repair for a relationship, or a kink identity anyone has to adopt.
A rope dress worn for a photograph is rope bondage. So is a constriction style built for sensation rather than restraint, where the point is the squeeze and not the capture. Neither requires a power dynamic, and neither says anything about who you are.
What rope produces is a wide range of feeling: deep pressure, restriction, the small constant awareness of being held, decoration, and photographs that look nothing like the room felt. Find the part that interests you and measure your curiosity against that, not against someone else’s.
Most of what makes rope bondage work happens before the first knot.
Rope Bondage Consent: What to Agree On Before the First Knot

Most bad rope bondage experiences begin with a conversation held ten minutes before the scene, when both people are aroused, nervous, and worried about spoiling the mood. The conversation is not the problem. The timing is. Misunderstanding produces more consent violations than cruelty does, and specificity is the fix.
Start days or weeks ahead. Ask why they want this and what they want to feel. Ask about experience, recent classes, and where they usually tie.
Ask about injuries, old fractures, back and neck problems, and health conditions. Ask which areas to avoid and whether anything emotional is likely to surface.
Then ask the question that matters most: how do you communicate under stress? Some people go quiet. Some go non-verbal.
Agree on how you will know they are not okay, and agree on a safeword plus a separate signal for slow down. Practice both before anyone is tied, because a signal nobody has used is only a theory.
Choose between opt-in and opt-out deliberately. Opt-in means only the listed activities happen. Opt-out means anything except the stated limits is fair game. A first scene should be opt-in, because it turns a vague yes into a specific one.
Consent can be withdrawn at any time, including mid-scene. Nothing new gets added during play, even if the tied person is enthusiastically asking for it.
Endorphins make that request unreliable. Scale back if needed. Never expand.
Agree on aftercare and a next-day check-in in the same conversation. Rule out alcohol, cannabis, and judgment-altering medication entirely.
If there are more than two of you, the negotiation grows. Multi-person rope needs explicit roles, explicit responsibilities, check-ins between every participant, and a plan for differing skill levels and group energy.
One sentence you can say out loud: “I want to try this, and I want to know what would make you stop.” The same conversation works with a long-term partner, a new date, or a third person. Leave it with a clear yes list, a no list, and a maybe list, and treat the maybe list as a no until you have talked about it again.
Rope Bondage Safety: Why Nerve Injury Is the Risk You Can’t Feel
One fact reorganizes everything else: a nerve injury from rope bondage can arrive with no pain and no symptoms at all. The first thing a person notices may be function that is already gone. “Tell me if it hurts” is not a safety plan, because the thing most likely to go wrong does not hurt.
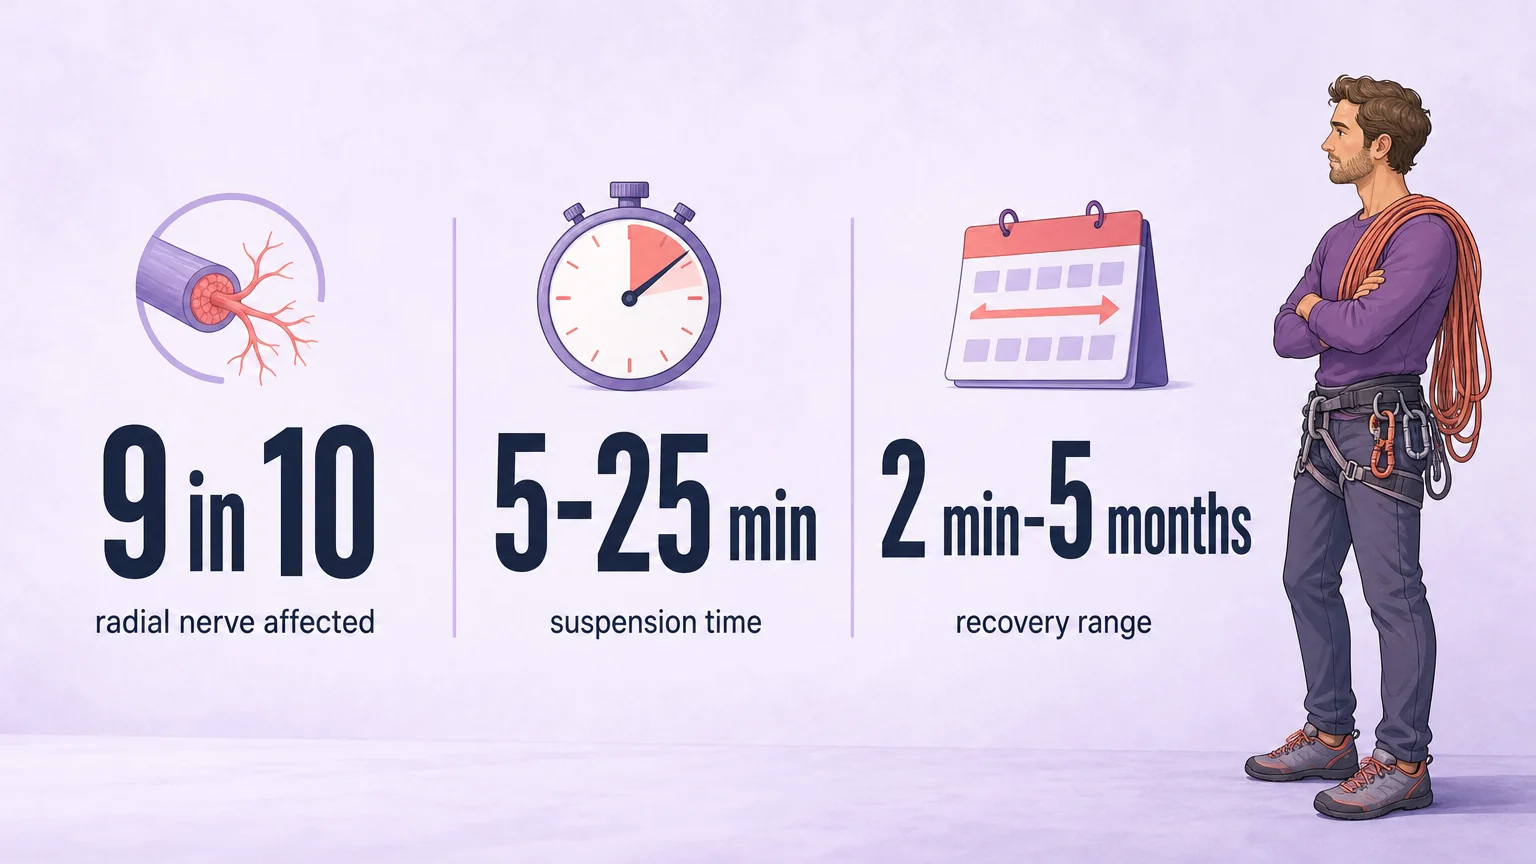
The clearest published picture comes from a 2023 case series in Cureus. Four experienced riggers reported on 10 people who had been suspended and afterward had 16 nerve injuries between them. The radial nerve accounted for 13 of the 16, or 81.3%, and 9 of the 10 people were affected.
Suspensions ran from about 5 to 25 minutes, with table entries up to 30. Recovery ran from 2 minutes to 5 months.
The index case is the one to remember. A 29-year-old woman spent 25 minutes in 6 mm jute and came away with a 77.3% conduction block. It took five months to resolve.
Later recurrences in the same person cleared in four weeks, then in two minutes, as the exposure got shorter. One other case did not follow the pattern: next-day pain and proximal weakness that built over several days rather than at once.
The sample is small and drawn from experienced practitioners rather than beginners. That does not make it irrelevant: the injuries happened to people who knew what they were doing, in scenes shorter than a movie.
Why the arm. The radial nerve lies against the back of the humerus at the spiral groove, where roughly 6.3 cm of it sits against bone near the distal deltoid tuberosity. Rope across the middle third of the upper arm, especially in a box tie with the hands behind the back, presses that nerve against bone.
Three zones carry most of the risk: the armpit and brachial plexus, the inner upper arm, and the wrists. The radial nerve turns toward the outside of the arm somewhere in the lower half of the upper arm, which is why wraps belong on the upper half.
What injury looks like. The most common is wrist drop. The wrist will not bend backward, and the person cannot give a thumbs-up. Recovery can take hours, days, or weeks.
Radial compression shows on the thumb side and in wrist extension. Ulnar compression shows on the pinky side and in grip.
Then the distinction that saves hands. Tingling across the whole hand is usually blood stasis. It is not alarming if it passes.
Tingling in one finger or a defined patch is a nerve signal, and the rope comes off. Whole-hand tingling can mask the single-finger signal, which is why motor tests exist.
The rule of thumb: the longer the compression lasts, the longer the damage lasts, and the sooner it is relieved, the sooner recovery starts. Rope safety guidance treats repeated compression as cumulative, which is one more reason to keep sessions short and leave recovery time between them.
The authors’ prevention list is unglamorous. Distribute load evenly. Keep concentrated pressure off nerve pathways. Limit duration.
Check regularly, avoid extreme limb angles, and learn some nerve anatomy. Skin color is not a useful circulation signal, so stop reading it.
Hand Checks and Emergency Release: How to Cut Someone Free
A hand check is a skill, not a slogan. In rope bondage, it matters when rope crosses the arms or wrists, and nowhere else. Agree before the scene who initiates and how often. Every few minutes is reasonable, and more often when the arms are behind the back.
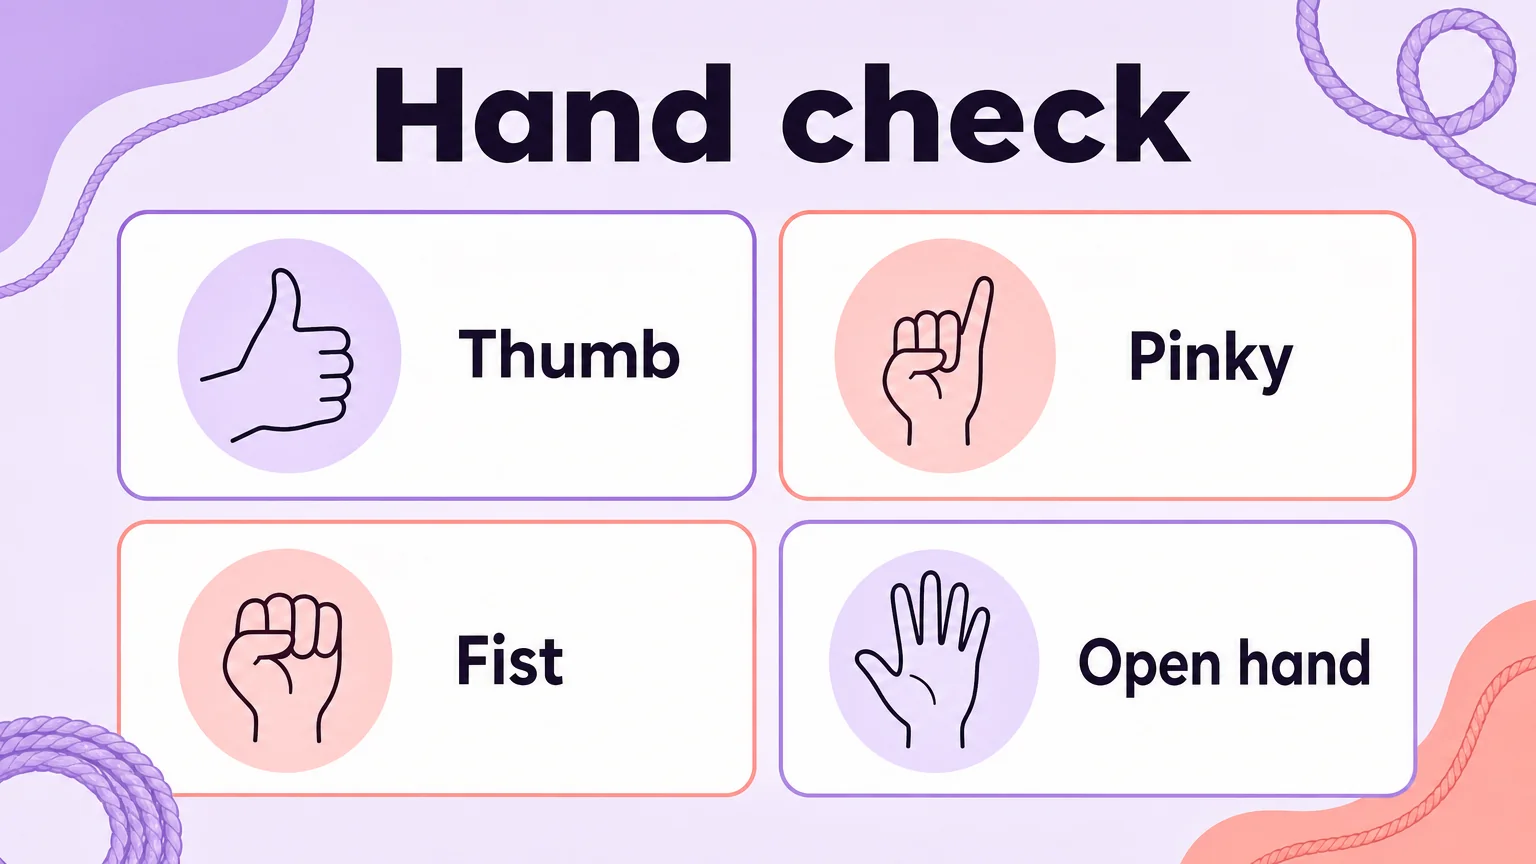
The check has four parts.
Does the thumb feel distinctly different from the rest of the hand? That tests the radial nerve. Does the pinky feel distinctly different? That tests the ulnar nerve.
Can the person make a fist and squeeze? That tests grip. Can they open the hand against your resistance? That tests extension.
Sensation belongs to the person in rope. A rigger can test motor function but cannot feel what the bottom feels, so teach the sensory questions before the scene rather than asking them cold.
If motor or sensory function is lost, release the compression immediately instead of waiting to see whether it returns. Because whole-hand tingling can make sensation testing useless, agree in advance that motor tests are the fallback. A strong electric shock in the pinch grip, or unbearable sensation, is a stop signal too.
Fainting is the other emergency. Heat, prolonged standing, abrupt position changes, dehydration, wrong breathing, strong pain, low blood sugar, and stimulation of the solar plexus or carotid sinus can all cause it. Warning signs are nausea, cold sweat, and tingling in the ears.
Carotid sinus fainting can happen in seconds. Solar plexus fainting arrives with fast nausea and little warning.
The response is the same either way. Stay calm and keep talking. Lower the person to the floor. Lay them on their back with their legs up on a chair.
Remove any gag or blindfold. Watch, because most people wake within seconds. Stay and help them reorient. Cut rope at the neck or face immediately; otherwise untie last.
For floor rope, the cut-down procedure has rules. Keep blunt-lip trauma shears within reach. Stabilize the body and control tension first. Pick the cut point on the outside of the limb, never the inside, and never across the neck or face.
Confirm you can fit a finger under the rope; if you cannot, move along the wrap. Slide the blunt tip under the rope with the flat face toward the body, squeeze at the base of the shears for leverage, and stop and look after each cut, because one cut can release more tension than expected. Then remove the remaining wraps calmly.
The tool matters less than its placement and its proximity. Basic EMT shears cut 5 to 6 mm rope and dull within a handful of cuts. Folding shears cut 8 mm and keep cutting.
A premium rescue multi-tool costs about three times as much, and most of its extras are built for ambulance work. A tensioned-line cutter is designed for a line away from a body. Kitchen scissors are not a plan.
A cutter you cannot find is not a cutter.
Choosing Bondage Rope: What to Buy First and How to Care for It
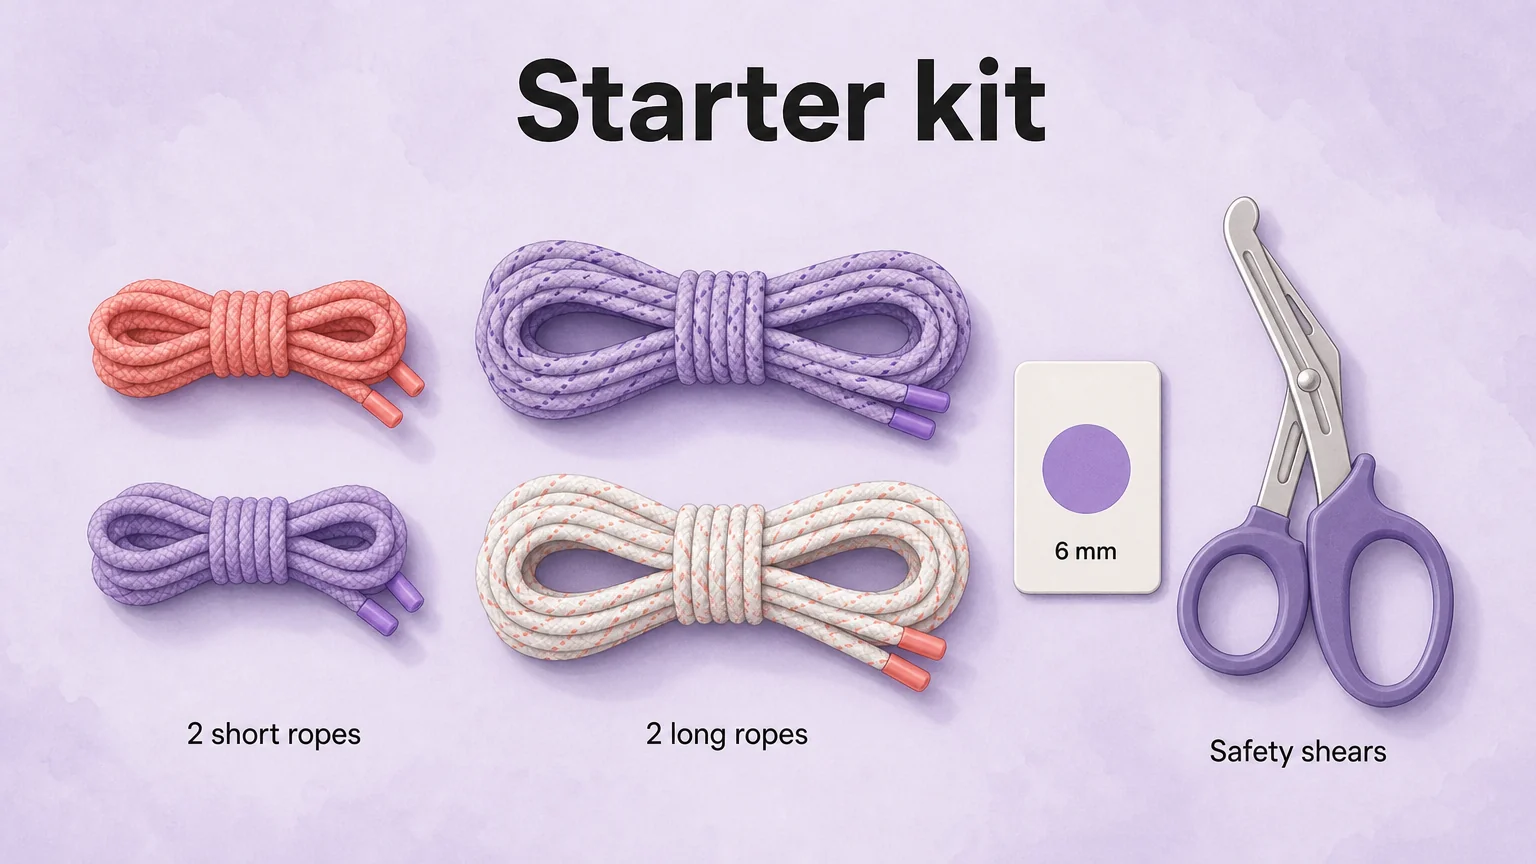
Buy two short ropes of 10 to 15 feet and two long ropes of 25 to 30 feet, in 6 mm diameter, plus shears. A standard working length is about 8 meters, and 6 mm, about a quarter inch, is the all-round diameter: thick enough to carry a body, thin enough for flat, stable knots. That set covers most ties.
Seven to 8 mm rope spreads load better and is preferred for suspension. Thinner rope concentrates pressure and raises nerve and circulation risk. Larger bodies should add wraps rather than buy thicker rope, which only adds bulk and pressure marks.
Fibers trade off differently. Jute is twisted, holds knots best, and has the traditional feel, but it is water-sensitive. Hemp is more washable but takes four to five days to dry and needs re-oiling. Cotton is soft and washable but plaited, so knots jam, and it is not for suspension.
Nylon is washable and slippery; polypropylene is stiff, prone to rope burn, and not for beginners. Worn rope loses strength with use and washing, which is why inspection and retirement matter as much as the fiber you choose.
For a beginner, that is the entire buying decision: one fiber, one diameter, and enough length to practice.
Care is a short routine. Run every rope through your hands before each session, checking the middle bend. Do a full inspection monthly.
Wash only when necessary. Store dry and loosely coiled, away from sunlight.
Hand-wash jute cold with gentle soap and dry it under tension. Chain-knot hemp, wash it cold in a pillowcase, and air-dry for four to five days before re-oiling with a small amount of food-grade mineral oil. Hand-wash cotton, silk, and bamboo cold and dry them in loose coils without oil.
Retirement is part of the routine. Thinning from 6 mm toward 5 mm, popped strands, uncorrectable high-stranding, widespread fuzziness, and brittleness all end a rope’s suspension life. Worn rope moves to harnesses, then floor work, then decoration.
Jute lasts one to three years with regular use; hemp lasts three to five or more. Frequent washing shortens both, since rope softens and loses strength.
Rope Bondage for Every Body: Size, Pain, and Mobility
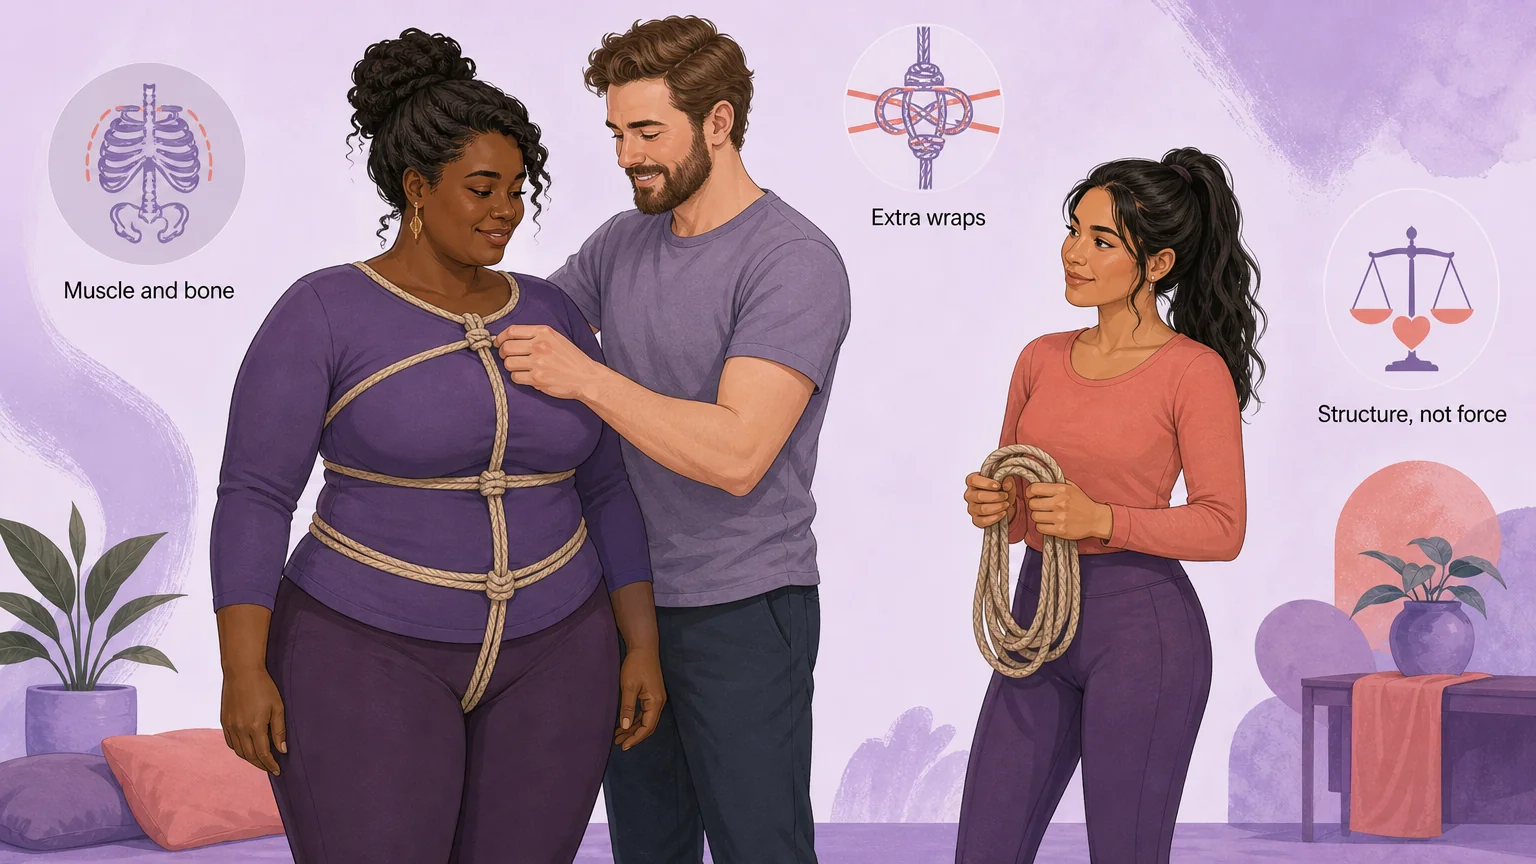
Fat will trick your eye. Rope placement should follow muscle and bone rather than appearance, and on a larger body that changes what a rigger does. Extra wraps work over dense tissue, but they drop into the valleys of soft tissue and create pressure where none was intended.
A pad of fat can sit between wraps and let the rope scrunch up. Long wraps migrate without added friction or a cinch. Michelining, which leaves a pad of fat between wraps, is one way to stop that. When tightness becomes intolerable, the answer is more structure, not more force.
Widen the frame beyond size. Ask every partner about baseline pain, flare patterns, sensation in the limbs, mobility, and areas to avoid. Ask everyone, not only the people who volunteer a diagnosis, because chronic pain does not predict what someone wants from rope bondage or which role they take.
Do not make a disabled partner your only teacher; do your own research outside negotiation. Keep mobility aids inside or beside the scene rather than parked at the edge of it. Treat floor or bed rope as a complete practice rather than a stepping stone, and build recovery time into the plan so stopping early reads as pacing instead of failure.
Sensory difference matters. Deep pressure can feel regulating for some people, and texture, temperature, and the sound of rope all matter. That is not the same as treatment. Rope is not a therapy for pain or any condition, and nobody should be sold it as one.
A chest harness on a larger body can work with extra wraps over the shoulders, added friction along the long runs across the back, and a cinch to stop migration. The shape changes. The principles do not.
Beginner Rope Bondage Ties: Single Column and a Simple Harness
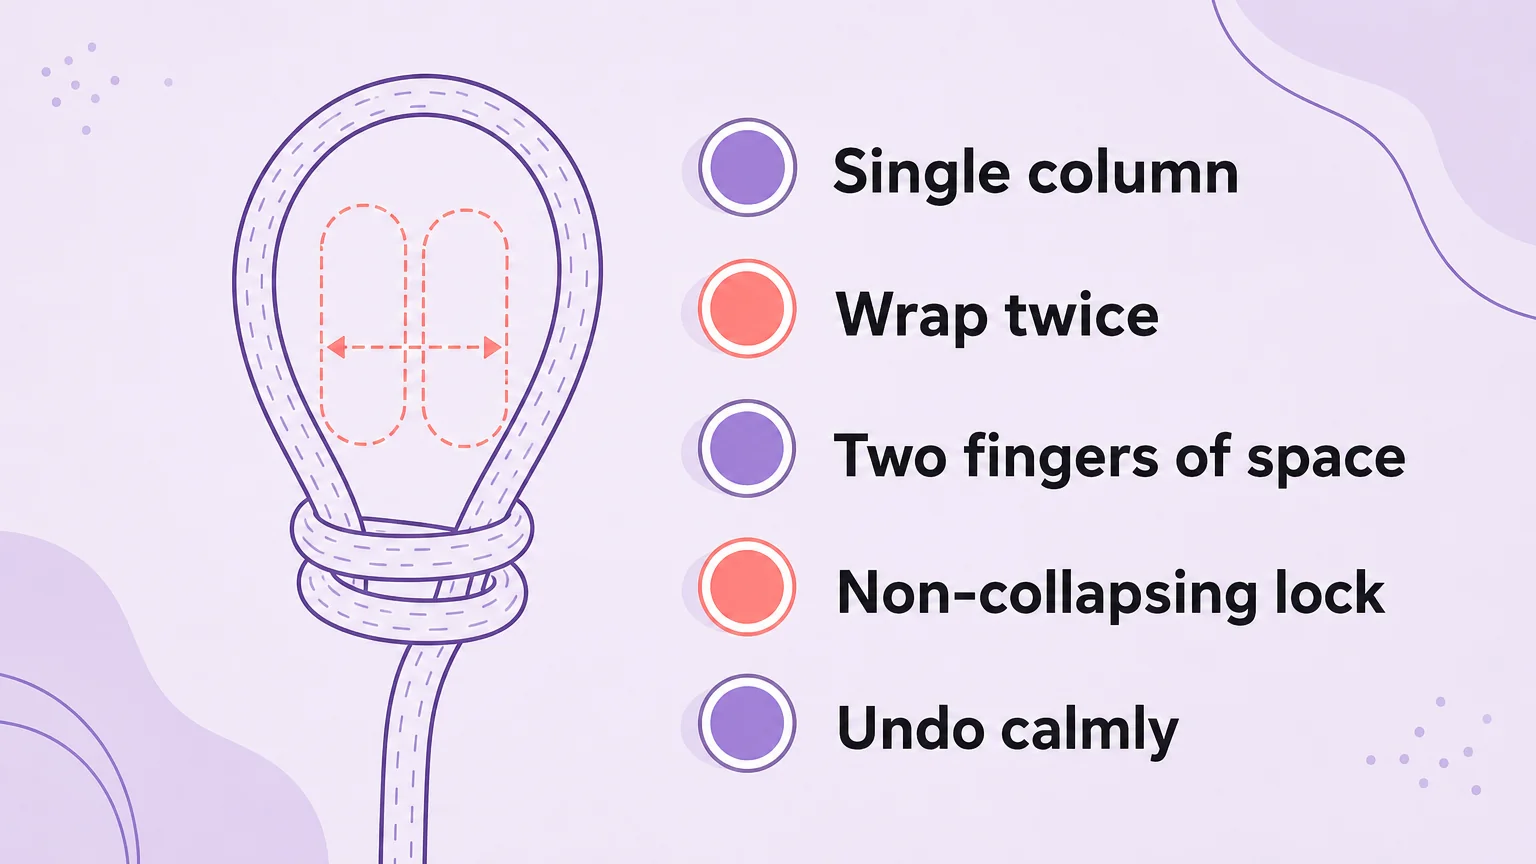
Start with the single column: a cuff around a limb, and the building block of almost every other tie. Learn the mechanics rather than a sequence. Wrap twice, leave two fingers of space inside the cuff, and use a version that cannot collapse, so the cuff does not tighten under load.
Pull the rope rather than push it, which damages the fiber. Tension comes from friction, not from hauling. A tie that needs force to stay in place is telling you the structure is wrong, not that you need to pull harder.
An overhand single column is quick and collapsible. It is fine for floor work and wrong for anything load-bearing. A Somerville bowline or a reverse-tension larkshead does not collapse, and that is the version to drill.
Place cuffs with the anatomy from earlier in mind. Above the wrist crease where possible. On the upper half of the upper arm, never across the middle third, where the radial nerve sits against bone.
The first multi-rope pattern worth learning is a chest harness. Keep wraps flat. Distribute load across the back and chest.
Keep rope off the front of the throat. Use friction or a cinch so long runs do not migrate.
Then practice, because rope bondage is a hand skill and hands learn by repetition. Break the single column into five chunks: building the wrap, constructing the loop, locking the cuff, switching hands, and switching directions. Practice without a model until the tie is reliable by feel.
Drill passing rope between the body and other ropes, and managing loose ends. Practice four common frictions and hitches behind your back to build dexterity without sight.
Drill speed while controlling both the rope and your own movement. A few minutes daily beats one long weekly session. Upline work and suspension belong later, with a teacher, not here.
The standard a first tie should meet is simple. You can undo it calmly. It does not tighten when the person moves.
Your First Rope Bondage Session: Setup, Pacing, and Aftercare

Set the room before anyone takes off a sock. A mat or soft floor. Shears within reach rather than in a drawer, where a hand can find them without looking.
Water. A warm room.
Phone away. Clear space to lower someone down if you need it. Check the blades before the scene, not during it.
Open slowly. Show the rope. Let the person look at it. Start with a tie you know cold, and watch the face rather than the pattern.
A short, simple tie establishes contact before any complex one, and the opening is a conversation rather than a performance.
During the scene, run the checks on the schedule you agreed to. Change position slowly, because standing and sudden movement cause fainting. Keep talking.
A short tie can be a complete rope bondage scene. Duration is not the measure of it.
The part people skip is the ending. The scene is not over when the rope comes off.
Stay connected. Hold hands. Sort the rope together.
Only then move to whatever comes next. Aftercare should have been agreed in advance, so offer the blanket, water, food, quiet, or company the person asked for, and debrief what worked and what did not. Aftercare lowers the risk of drop. It does not prevent it.
Drop is worth naming plainly. Onset can be immediate, within a few hours, or a few days later. Reported duration runs from a day to a week in some accounts and from days to several months in others. People who are tied report it more often and more intensely than people who tie.
Symptoms include sadness, restlessness, irritability, heaviness, self-doubt, chest tightness, and appetite loss. Tops more often report exhaustion and feeling unwell, and top drop is underreported because tops are often socialized as caretakers.
Treat it like a hangover: protein, electrolytes, sleep, low stimulation. Call it drop. Call it temporary, and say so out loud. Do not renegotiate important boundaries while judgment is still affected, which can last hours or days.
Make the next-day check-in part of the ritual rather than an optional extra. A message the next morning is enough. Ask how the body feels, how the mood is, and whether anything needs to change next time.
That is the whole session. Nothing in it required a complicated tie.
Self-Tying and Suspension Bondage: Why the Risks Change
Self-tying is rope bondage with the safety net removed. No one is there to notice a problem and no one is there to release it. Numbness from circulation loss can make the escape the person planned unusable.
Redundancy is not optional. The minimum is a backup release reserved for genuine emergencies, and no one should learn release mechanics from an article. Wikipedia’s self-bondage entry calls the practice higher-risk for exactly this reason, though that entry summarizes reported practice rather than a measured comparison.
Suspension is a different discipline, not the next step after floor ties. The load path changes. With a single upper redirect, an anchor can see roughly twice the suspended person’s body weight, and knots can cut a rope’s nominal breaking load by up to half.
A fall from half a meter can be life-threatening because a bound person cannot break their own fall. Anchor failure is catastrophic, and cutting a loaded rope can drop or invert the person. Those load figures are widely repeated benchmarks rather than a single standard.
The instruction that follows is not a technique. Learn suspension in person, with a teacher who can watch your hands, a spotter, a mat, and rated equipment. There is no safe way to self-teach it.
Both practices punish improvisation. Neither is required to have a full practice.
Rope Bondage FAQ: Common Beginner Questions
Is rope bondage safe?
It can be, within a specific risk profile. Nerve compression is the main physical risk, and placement, duration, and scheduled checks manage it. A 2023 case series documented injuries after suspensions of 5 to 25 minutes, so keep scenes short.
How long can someone stay tied?
There is no universal safe duration. The injury series documents nerve damage after suspensions of roughly 5 to 25 minutes, and longer compression tends to mean longer recovery. Keep sessions short and then check hand function on a regular schedule.
Is numbness during rope play normal?
Whole-hand tingling is usually blood stasis and is not alarming if it passes. Tingling in one finger or a defined patch is a nerve signal, and the rope comes off. Agree on motor tests in advance, before the scene.
What if my partner cannot speak mid-scene?
Agree on a physical signal before the scene, such as a tapped hand or a dropped object, and check on a schedule rather than waiting for a voice. Ask beforehand whether your partner goes quiet or non-verbal under stress.
Do I need a partner for rope bondage?
No. A rope around your forearm is enough to learn the mechanics of a cuff, and a chair leg works as a model. Tying your own body so you cannot escape is a different risk category and needs redundant releases.
When should someone see a doctor?
See a doctor for any weakness or numbness that does not resolve quickly after the rope comes off. Lasting symptoms deserve assessment, and nerve conduction studies or electromyography can measure the damage. Do not wait to see whether it settles.
Does rope drop affect the person tying?
Yes. People who tie report drop too, as physical exhaustion and feeling unwell rather than sadness. It is underreported because tops are often socialized as caretakers. The same aftercare and check-in apply to the person who held the rope.
The hardest part is finding people who say what they want and listen when that changes. That is what 3Fun is for.