You bought the rope. You watched a few videos. Now you are staring at 30 feet of hemp wondering what comes next. Learning BDSM knots should not feel like decoding a secret language, yet most guides either describe ties without teaching them or skip straight to suspension.
Rope bondage in BDSM builds communication skills that transfer to your entire relationship. It does not require flexibility, a specific body type, or prior experience. If you have a body, it is a rope body.
Safety is non-negotiable. Nerve damage accounts for roughly 90% of rope injuries and can happen within seconds, without pain. EMT shears within arm’s reach. Two-finger spacing at every point. Never leave a tied person alone. Never tie across the throat. Full details in the FAQ.
Each knot is self-contained. The recommended progression is Lark’s Head and Half Hitch first, then the Single Column Tie. Practice on a chair leg before tying on a wrist. The goal is a handful of tools you know well enough to focus on your partner instead of the rope.
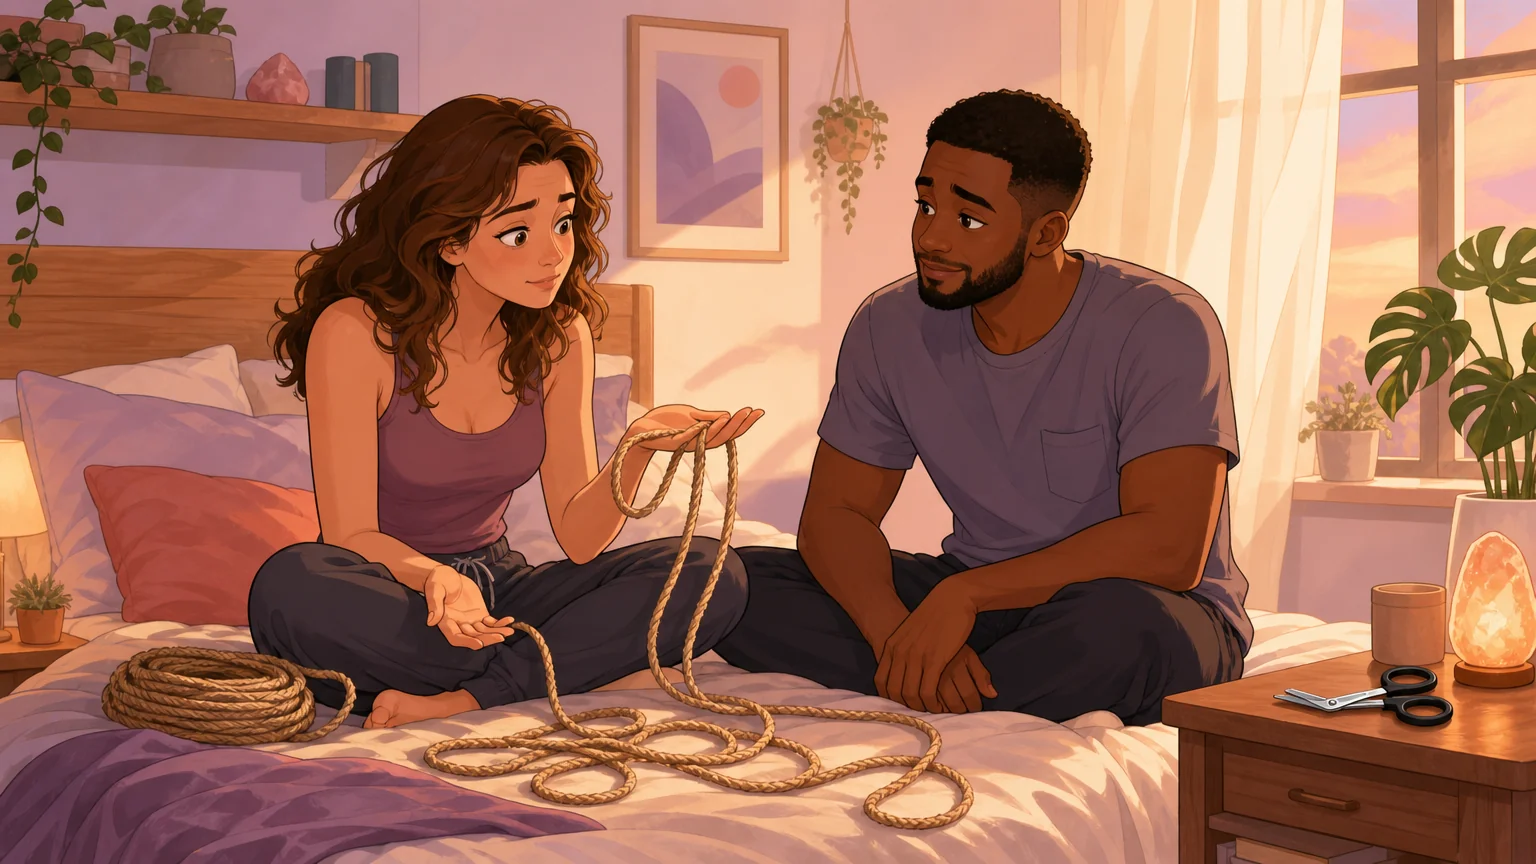
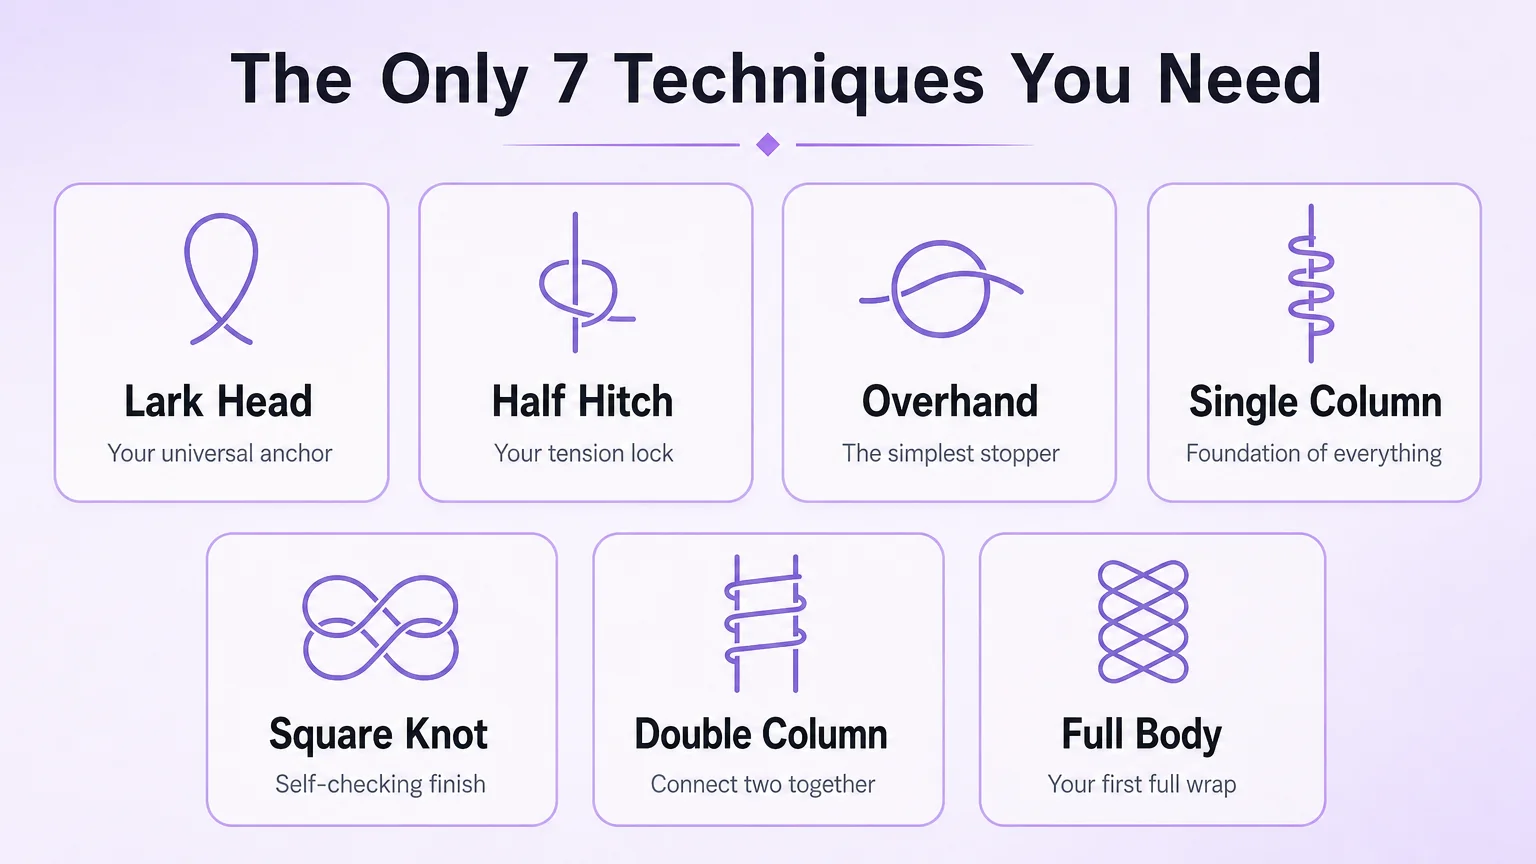
1. The Lark’s Head (Cow Hitch): Your Universal Anchor
If you learn nothing else today, learn this. The Lark’s Head takes five seconds and is the difference between rope that stays put and rope that slides off the bed frame mid-scene.
What it is. The Lark’s Head (Cow Hitch) creates a secure attachment point between your rope and any object: a wrist, a bed frame, a chair leg, or another rope line. It is the first step in virtually every tie because it gives you a stable starting point from which to build. In a thigh tie, it anchors at the waist before the line runs down the leg.
When to use it. Any time you need to anchor rope to something. Starting a limb tie. Attaching rope to furniture. Connecting two ropes together. Beginning a body harness. It is the default first move in BDSM knots work.
Step by step.
- Find the bight (midpoint) of your rope by running both hands from the ends toward the center. Always start from the bight.
- Place the bight behind your anchor point: a bed post, a wrist, a chair rung.
- Bring the bight forward, creating a loop in front of the anchor.
- Pass both tails through the loop of the bight.
- Pull the tails to tighten. If tying on skin, maintain two-finger spacing.
- To continue tying from here, reverse the direction of pull so tension catches on the next step.
Safety notes. The Lark’s Head itself is harmless. It is an anchor, not a constricting knot. The only risk is placement: never Lark’s Head directly across a joint (wrist bone, elbow, knee). Position above or below the joint. On a limb, the bight loop should sit on the outer side, not against a nerve pathway.
In a real scene. You and your partner have negotiated. Shears, water, blindfold are ready. You find the bight. You Lark’s Head around their wrist. The rope is attached. The scene has begun. Everything else builds from here.
2. The Half Hitch: Your Tension Manager
If the Lark’s Head is how you start, the Half Hitch is how you steer. One Half Hitch is gentle and easy to adjust mid-scene. Three in a row will not budge.
What it is. The Half Hitch secures your working rope to an existing line (another rope, not skin) and holds position through friction. Unlike most knots, its holding power comes from tension, not structure. Tighten it and it grips. Loosen it and it slides. This makes it one of the most versatile BDSM knots in any rigger’s toolkit.
When to use it. Any time you need to secure rope along a path: running down a leg, across a torso, along a harness line. Stack multiple Half Hitches for progressively stronger hold. It turns a single rope line into a structured tie.
Step by step.
- Bring your working rope over the anchor line (the existing rope, not the body).
- Pass the working end behind the anchor line.
- Pull the working end through the loop you just created.
- Pull tight. Tension is what locks it, not the knot geometry.
- To adjust the angle: give a small amount of slack in the direction you want the rope to lean, then tighten.
- Stack another Half Hitch directly behind the first for stronger hold. Two or three create a progressively locking chain.
Safety notes. Never tie a Half Hitch directly around skin. It grips another rope line, not a body part. If tied on the wrong line (the one behind instead of the one in front), it will slide continuously. Keep wraps underneath at two-finger tightness.
In a real scene. You anchored at the waist with a Lark’s Head. Now you run rope down toward the thigh. Each Half Hitch locks the line in place. You angle left, angle right. Tiny slack adjustments steer the rope’s path. Your partner feels the line tracing their body. The tension holds. You have not used a single complicated knot.
3. The Overhand Knot: The Simplest Stopper in Your Kit
This is the knot you already know. The one you tie when double-knotting shoelaces. In rope bondage, it plays two roles: a stopper that prevents rope from pulling through, and a quick finishing knot. Simple does not mean unimportant.
What it is. The Overhand Knot is a single loop with the end passed through. It serves as a stopper and a quick finishing knot on simple ties. It is also the core mechanism inside the Overhand method Single Column Tie, the simplest of the five SCT variations. Among foundational BDSM knots, this is the one you already have wired into muscle memory.
When to use it. Finishing a tie when you need a basic stopper. Adding a safety backup behind another knot. It is the knot you reach for when you just need something to hold and do not want to think about technique.
Step by step.
- Create a loop by crossing the working end over itself.
- Pass the working end through the loop from behind.
- Pull both ends to tighten.
Critical safety note. In its Overhand SCT form, this knot is collapsible. It will cinch down under load. When it collapses, the rope line becomes straight with no bend, constricting directly onto the column. For floor work where load is minimal, it is safe. Never use an Overhand-finish SCT for any tie that will bear significant weight or pulling force. For a more stable version with nearly identical simplicity, use the Boola Boola variation in the next section.
In a real scene. You wrapped a simple chest line. An Overhand Knot at the termination point finishes it. Five seconds, done. But if this wrap will take any tension, if your partner might pull against it, upgrade to the Boola Boola or Square Knot finish.
4. The Single Column Tie (Boola Boola Method): The Foundation of Everything
Every harness, every chest tie, every body wrap begins with a single column tie somewhere on the body. The Boola Boola variation is the sweet spot: same simple shape as the basic overhand, but significantly more stable because of one small technique change. Mastering this knot unlocks the rest of BDSM knots practice.
What it is. The Single Column Tie (SCT) wraps around a single “column”: a wrist, an ankle, or any limb. In Bound Studio’s words: “Many shibari ties are going to begin with an anchor single column tie. The important safety consideration is that they must be tied in a way that they are not going to neither tighten nor loosen when force is applied.”
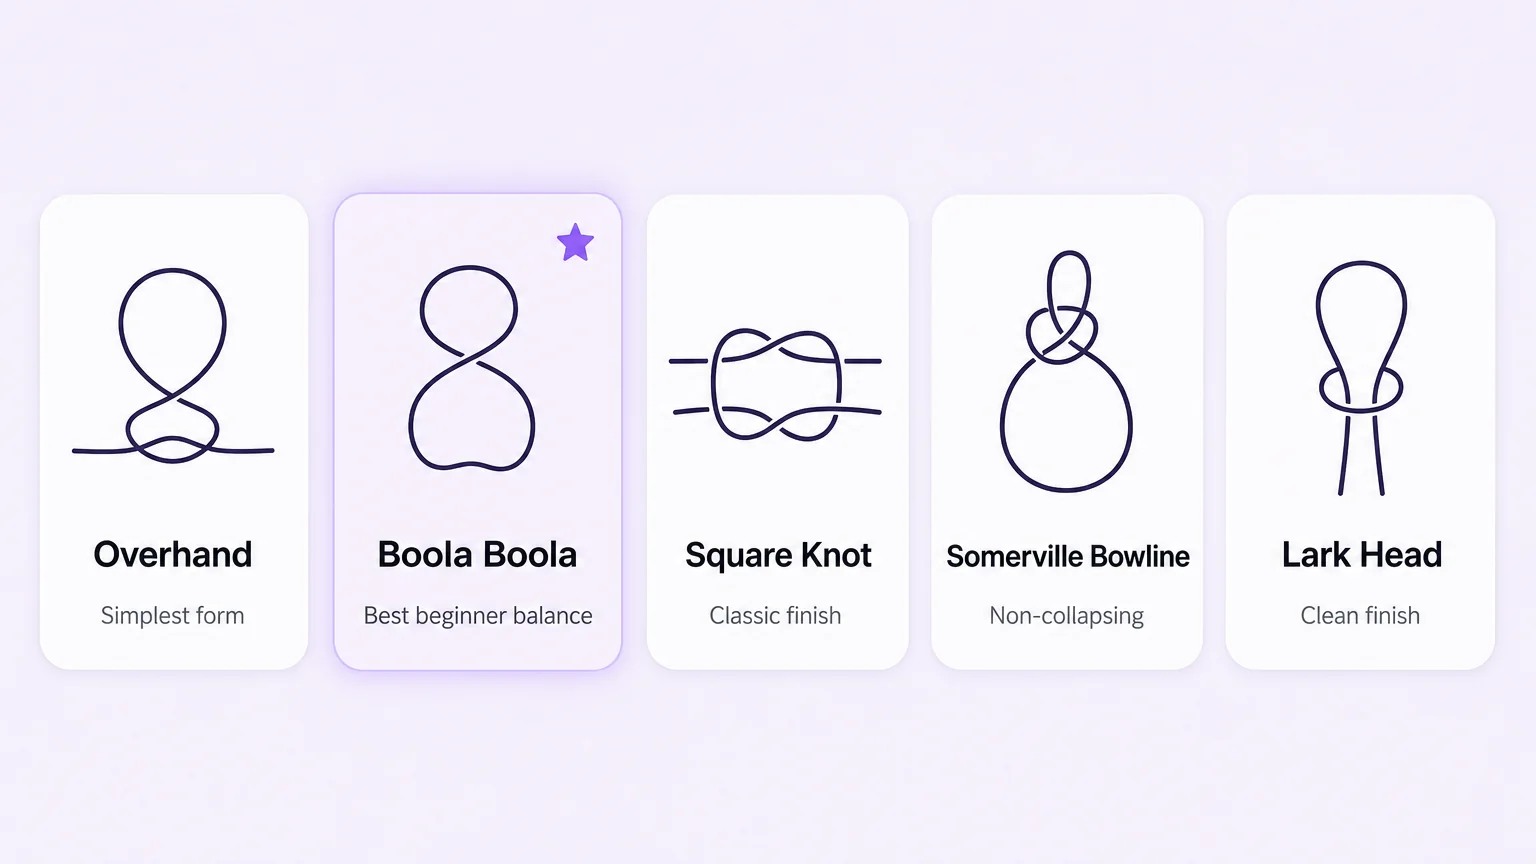
Of the five variations, the Overhand is simplest but collapsible and floor-only. The Boola Boola uses a loop-first technique that concentrates force differently, making it the best balance of simplicity and safety for beginners. The Square Knot (Hon-Musubi) is the classic Japanese finish with a signature “little U” visual check. The Somerville Bowline is the only non-collapsible option, required for suspension but not needed yet. The Lark’s Head finish is inescapable but impractical for long ropes.
Step by step (Boola Boola).
- Find the bight. Always start from the bight, never from an end.
- Wrap twice around the wrist or ankle, maintaining two-finger spacing. Keep wraps flat. No twists. Twists cause nerve compression.
- Leave approximately 6 inches of bight extending past the second wrap.
- Cross the bight over both tails.
- Thread the bight under all wraps and pull through to the other side.
- Tension check: pull away from everything. All lines should come away evenly. Uneven wraps concentrate pressure.
- The Boola Boola lock: create a loop with your left hand (thumb and forefinger forming a circle), ensuring the tails end up in the center. Place the long end over your thumb, then shove the bight through the loop. This is the key difference from the Overhand method: the bight goes through a pre-made loop rather than over the hand.
- Place a finger on the emerging bight to keep ropes flat.
- Tighten by pulling the running end. Both bite and long end must be under the same tension.
- Verify: the tie should neither tighten nor loosen under force. If it cinches, untie and redo.
- Optional: add a shibari twist lock for extra stability on longer scenes.
Safety notes. The radial nerve at the middle third of the upper arm is the number one injury site. Never place SCT wraps over this area. Wrist ties sit below the wrist bone, not on it. Check for numbness, tingling, or shooting sensations within the first minute and continuously. Nerve damage can be painless. You cannot rely on pain as a warning.
Body adaptation. For larger wrists or ankles, use three wraps instead of two to distribute pressure. For limited wrist mobility, tie the SCT above the elbow or around the thigh. Adaptation is not compromise. It is how you honor the body in front of you.
In a real scene. You Lark’s Head to the bed frame. You Boola Boola around your partner’s wrist. They flex their hand. You check the two-finger gap. They meet your eyes and nod. You are no longer just trying rope. You are doing shibari.
5. The Square Knot (Reef Knot): The Finishing Knot That Checks Itself
Few knots come with their own visual quality assurance. The Square Knot does. When tied correctly, it produces a distinctive “little U” shape at the locking point. If you see a straight line instead, you made the dangerous version. Untie and redo.
What it is. The Square Knot (Reef Knot), known in Japanese as Hon-Musubi, is the classic shibari finishing knot. As an SCT variation, it creates one of the strongest floor-work ties with that signature visual check, making it indispensable among finishing BDSM knots.
The visual check that saves scenes. When tied correctly, the finished Square Knot SCT produces a complete U-turn bend with a “little U” visible at the locking point. A straight line means the knot will constrict onto the column under tension. “If it does collapse on you or if it is tied incorrectly, you are gonna have this quarter bend which could turn into a line going straight and causing this wrap to cinch down onto your column.”
Step by step (Square Knot SCT).
- Start with bight, wrap twice with two-finger spacing.
- Cross bight over both tails, thread behind all wraps and out the other side.
- Tension check: everything should come away evenly.
- Underhand lock: bring the bight under the tails (not over, as in the Overhand method), then down and through the loop.
- Reverse the direction of the tails so they face upward.
- Tighten in parallel to the anchor. This creates the signature square shape with the U-turn bend.
- Verify: you must see the “little U.” No U means wrong. Untie and redo.
- For extra stability, add one additional lock over the finished knot.
Standalone finishing use. When binding two rope ends together: left over right, then right over left. Equal tension. The knot lies flat when correct and forms a granny knot when one crossing is reversed. Always add a second overhand knot behind a standalone square knot. Never rely on it alone under tension.
Safety notes. This knot is collapsible: safe for floor work, not for suspension. The quarter bend is the danger point. The visual U-check is your safeguard. Never proceed with a Square Knot that does not show the little U.
In a real scene. You wrap a double column around both wrists. You lock it with a Square Knot. You look down and see the little U. That little U is the difference between a scene that flows and one where you are nervously checking the rope every thirty seconds.
6. The Double Column Tie: Binding Two Limbs Together

The SCT handles one limb. The Double Column handles two: wrists together, ankles together, or the classic frog tie (ankle to thigh). It is built directly on the mechanics you already learned from earlier BDSM knots.
What it is. The Double Column Tie wraps around two “columns” and secures them together. It uses the same wraps, tension check, and lock-off as the SCT but bridges two limbs with a cinch in the middle. It transforms rope from “attached to something” into “restrained in a specific position.”
When to use it. Wrists together (in front or behind, depending on flexibility and negotiation). Ankles together. Ankle-to-thigh frog tie. The opening move in a bed-based scene.
Step by step.
- Position the two limbs with a small gap between them. Compressed limbs can mask circulation issues.
- Find the bight and place it between the two limbs.
- Wrap around both limbs, maintaining two-finger spacing. Two to three wraps for wrists, two to three for ankles.
- Between the limbs, create a cinch: wrap the rope around the bridge between the two columns, pulling gently to bring the wraps together.
- Complete one to two cinch wraps. This prevents the limbs from sliding apart.
- Finish with a Square Knot or Boola Boola lock-off at the termination point.
- Tension check: two fingers at every point on both limbs and between the columns. Snug, never compressive.
Safety notes. Keep a gap between limbs. Check each limb independently. One wrist might be fine while the other is going numb. The cinch should never bear on a nerve pathway. For behind-the-back wrist ties, assess shoulder mobility first. Some people cannot comfortably bring their hands behind their back. Offer an in-front alternative without making it feel like a downgrade.
Body adaptation. For different-sized wrists, use extra wraps on the smaller limb to even out tension. For joint sensitivity, skip the frog tie and use separate SCTs on each ankle. Same result without the flexed-knee stress.
In a real scene. You tied a single column on each wrist. Now you bring them together and wrap the double column. Your partner tests the hold. The cinch keeps them together without pinching. They relax into the restraint. You check both hands for warmth. This is the moment the scene shifts from “we are trying something” to “we are doing this.”
7. The Bikini Harness: Your First Full Body Tie
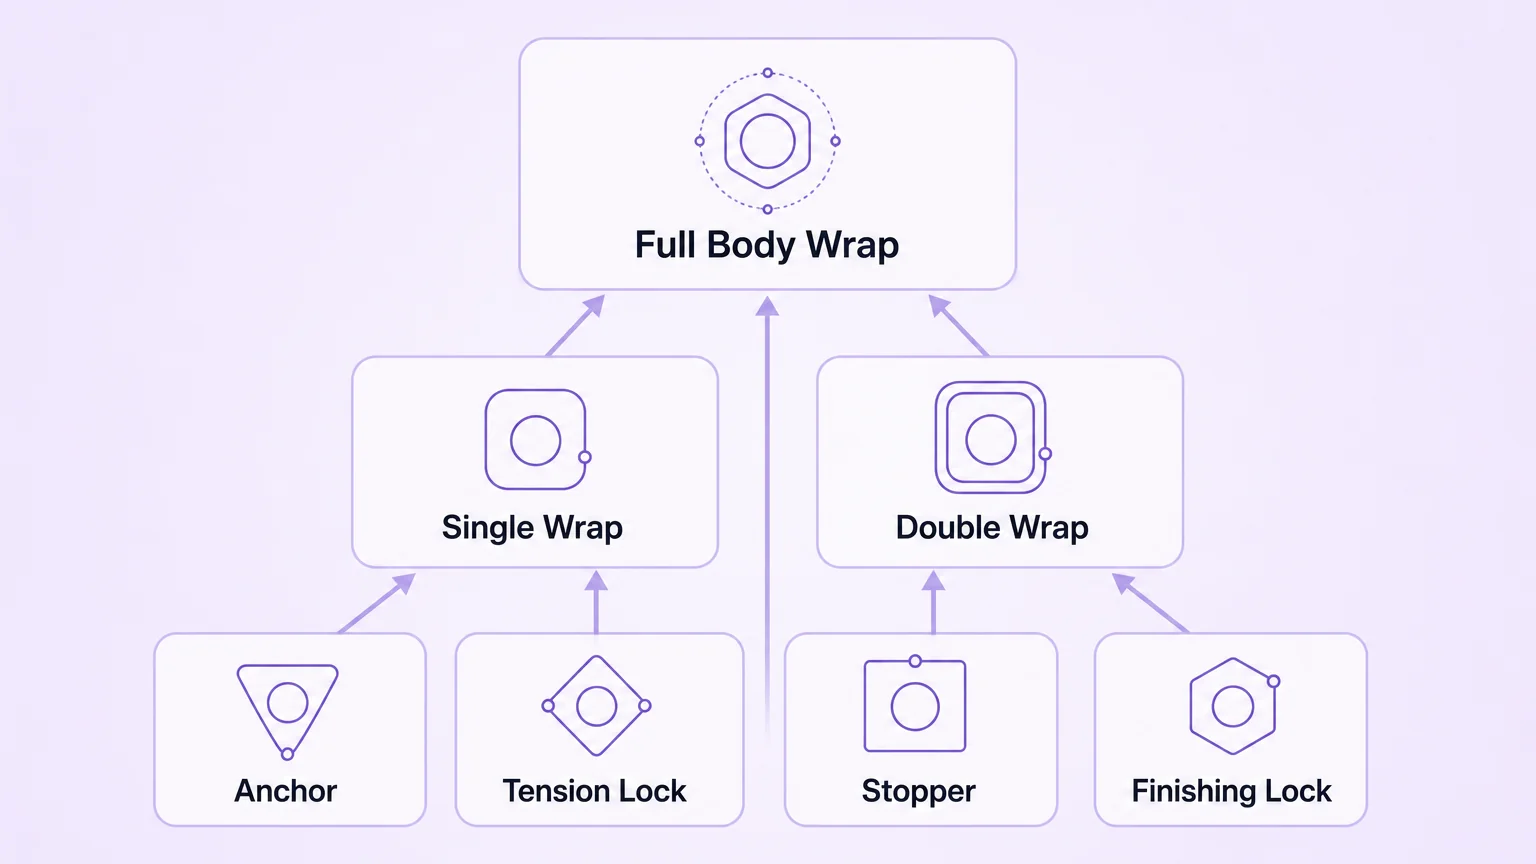
You have learned to anchor, to tension, to finish, and to bind limbs. Now you use those same fundamentals to create something that wraps the body itself. The Bikini Harness uses zero new BDSM knots and looks far more impressive than the skill it requires.
What it is. A simple body harness wrapping around the waist and between the legs, creating a rope bikini shape. It uses only Lark’s Heads, Half Hitches, and a finishing knot. It is the entry point to body harnesses and the first tie that makes beginners feel like they created something rather than practiced a skill.
When to use it. After you are comfortable with limb ties. As a standalone decorative or sensual tie. As a confidence builder.
How it flows.
- Anchor at the waist: Lark’s Head at one hip, wrap around the waist twice like a belt with two-finger spacing.
- Secure the waist wraps with Half Hitches at center back or front.
- From the center of the waist line at the front, drop a line down between the legs, passing under the body.
- Bring the line up the back to meet the waist wraps.
- Secure at the back with a Half Hitch to the waist line.
- Optionally, bring the line back over one hip for a diagonal accent line.
- Finish at a hip anchor point with a Square Knot.
- Check all lines: two-finger spacing everywhere, no pinching at the crotch rope pass-through, waist wraps not riding up into ribs.
Safety notes. The crotch rope should never bear full body weight; this tie is decorative, not load-bearing. Check waist wraps are not compressing the diaphragm or pressing into the armpit area (brachial plexus nerve bundle). For larger chests, keep wraps below breast tissue. Never compress breast tissue directly. For partners with penises, negotiate the crotch rope path beforehand.
Body adaptation. For plus-size bodies, use longer rope and allow more distance between wraps. Position the belt at the natural waist or lower hips. For pregnancy, skip the crotch rope and do waist wraps only. Adaptation is not compromise.
In a real scene. You tie a Lark’s Head. You wrap twice around their waist. You Half Hitch it into place. You drop the line. They feel the rope trace a path down their body. You secure it behind, finish with a Square Knot at the hip. They look down at the geometry of rope across their skin. That is rope bondage.
Ready to practice on someone just as interested as you are? 3Fun connects couples and consent-first singles who want to explore rope together — no awkward “so, about the rope…” conversation required.
Frequently Asked Questions About BDSM Knots
What safety gear and rules do I need before touching rope?
EMT safety shears within arm’s reach. Test them on your rope before every scene.
Two-finger spacing between rope and skin at every point.
Nerve damage is sudden, often painless, and accounts for roughly 90% of rope injuries. Circulation loss is gradual: coldness, pale skin, pins and needles. You cannot rely on pain as a warning.
Time limits: 15 to 30 minutes for new bottoms, max 60. Tie limbs last. Never leave a tied person alone. Never tie across the throat. No suspension in your first year.
Gear: 6mm hemp or jute, 25 to 30 foot lengths, two to three pieces. Avoid under 5mm. Boil new rope three to five minutes, two to three rounds. Condition with jojoba oil every few months. Store hung in a breathable bag.
What type of rope should a complete beginner buy?
Start with 6mm diameter, 25 to 30 foot lengths. Hemp and jute hold knots well but need conditioning. Cotton is soft and affordable but stretches. Synthetic is durable but slippery for learning. Buy two to three lengths. Avoid under 5mm. The Twisted Monk Curiosity Kit (one 30-foot and two 15-foot pieces of 6mm hemp, includes shears) is a solid starter.
How tight should the rope be?
Two fingers must slide between rope and skin at every point. The tie should be snug but never compressive. If a bottom asks for tighter, that means more wraps to distribute force, not more tension on existing wraps.
How do I know if something is wrong, nerve damage vs circulation?
Nerve compression: sudden onset, shooting or electric sensations, numbness in specific patterns (radial nerve: back of hand and thumb; ulnar nerve: pinky and ring finger), weakness. It can be painless. Circulation loss: gradual, coldness, pale skin, generalized pins and needles. If anything feels unusual, speak up. The most dangerous phrase in rope is “I did not want to ruin the moment.”
Do I need to be flexible or have a certain body type?
No. If you have a body, it is a rope body. Skilled riggers adapt to any body type. Better Bondage for Every Body by Evie Vane covers adaptations for plus-size bodies, joint issues, and chronic conditions. The Shibari Guide for Seniors addresses practitioners aged 40 to 80 and beyond.
What is aftercare and what does it specifically involve for rope?
Aftercare is the cool-down after a rope scene, for both partners. Physical: warmth, hydration, nutrition (chocolate or fruit), circulation recovery. Emotional: presence, reassurance, gentle debrief (positive only; save feedback for the next day). Riggers commonly need validation they are “not a bad person for doing bad things.” Budget at least 30 minutes; prepare supplies beforehand. Follow up 24 to 48 hours later. Aftercare is part of the practice.
Can I learn rope bondage alone?
Yes. Self-tying is a legitimate practice with its own tutorials and community. Start with simple harnesses you can see and reach. Practice knots on chair legs or your own ankles. The repetitive, precise nature of self-tying is inherently calming. Never self-tie in a way that could become inescapable. Keep safety shears within reach.
What does a first rope scene actually look like?
Pre-scene: negotiate experience, desired feelings, medical conditions, safewords, and aftercare needs. Setup: two to three rope lengths, shears within reach, blindfold, soft surface, pillows, water.
Apply the blindfold first. Start with a double-column wrist tie. Move slowly. Guide bound wrists up and back, run tails down the back, wrap around waist. Use pillows. Monitor continuously for numbness and circulation. Untie slowly. Post-scene: immediate aftercare (water, sugar, warmth, presence). Follow up 24 to 48 hours later.
How do I wash and care for bondage rope?
Wash only when necessary. Hand wash in cool water with mild soap. Never wring. Air-dry under tension in a cool, shaded space. Never machine dry or use direct sunlight. Condition with jojoba oil every few months. Never use vegetable oils. Store hung in a breathable bag, never airtight. Inspect before every use. Retire rope showing significant wear.